


How to Make an EZScreen DIY Silk Screen Stencil Tutorial
Making an EZScreen Stencil


Detailed instructions are included in all kits and refill packs.

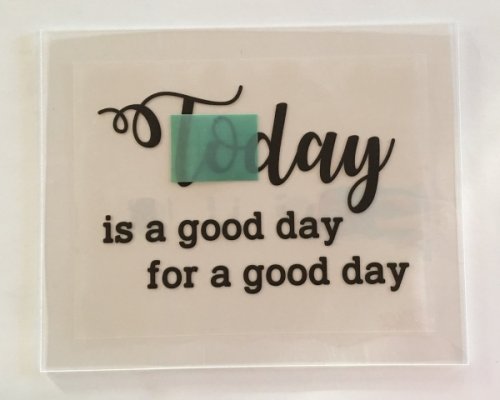
Start by printing your artwork on either the Ink Jet or Laser/Copier transparency provided in the EZScreen Basic or Complete Kit. View detailed instructions of printing your artwork if you need further assistance or tips.

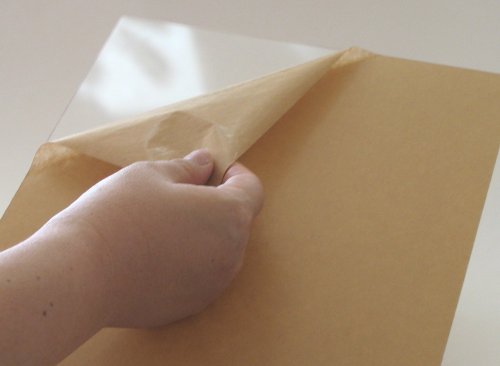
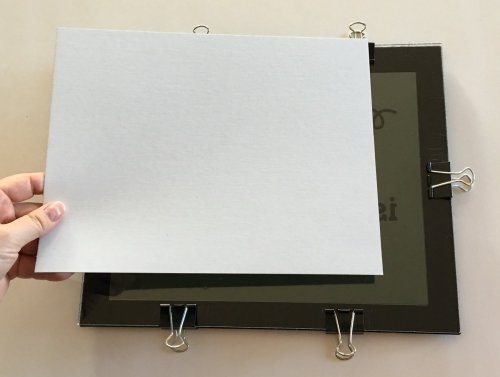
Peel off the protective backing on both sides of the clear board (part of the exposure board unit).

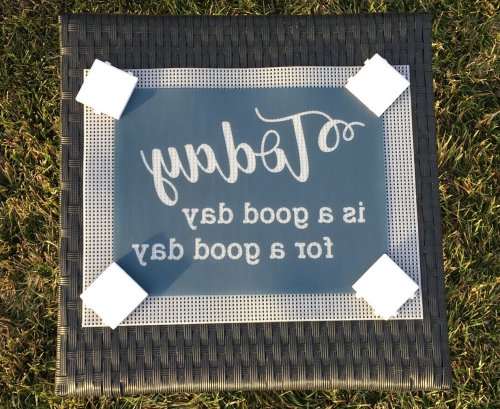
Center artwork on the clear board so it is legible if there is wording.

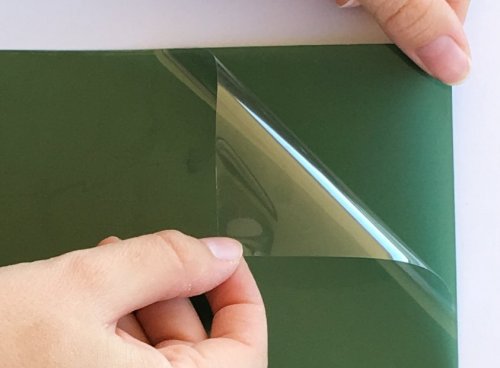
Peel clear protective backing from EZScreen Stencil. Discard clear backing.

Place EZScreen Stencil on artwork, shiny (emulsion) side down.

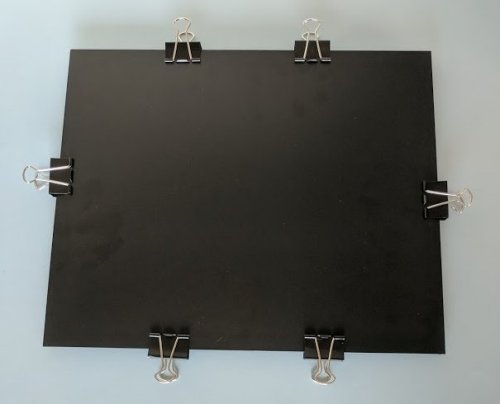
Add black board (part of the exposure board unit) felt side down.


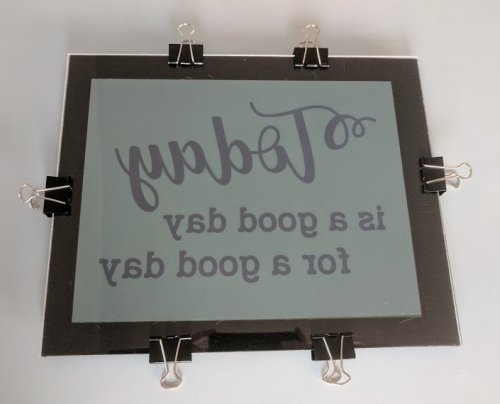
Add Clips. Flip over to be sure the clips do not cover the stencil and artwork during exposure. Your artwork will appear reversed.

Cover the stencil with something opaque, like the chipboard provided in the stencil packs. Keep the stencil covered to prevent additional light from pre-exposing the stencil until you are ready to expose to light source.

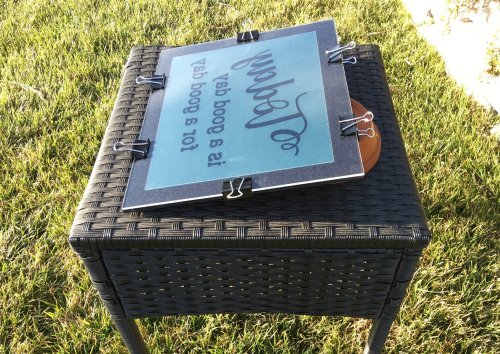
Remove the cover and expose outside in direct sunlight for 1 minute. Use something to prop the exposure unit perpendicular to the sun if necessary. After one minute, cover exposure unit again with chipboard to prevent over exposure.
Temperature does not matter; however, summer months may take less time to expose than winter months. Exposure time may vary per location, time of day, etc.
If sunlight is not available, we strongly recommend using one of our tested artificial lights to expose the stencils. Using your own light may result in over or under exposed stencils.

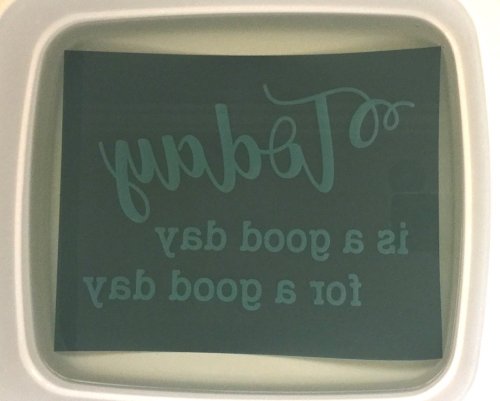
Soak in a sink or bucket of tap water for a minimum of 15 minutes. A ghost image will appear.

Use a plastic canvas to support the EZScreen stencil during rinsing. Rinse with cold or lukewarm tap water. A kitchen sprayer works great. If needed, use a soft brush to remove excess residue on the emulsion side of the stencil (reversed side). Be sure all the emulsion residue is completely rinsed off otherwise the ink will not go through the silkscreen.

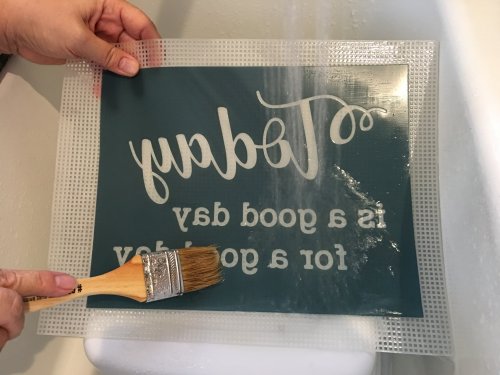
Cure the stencil in sunlight. This process solidifies the emulsion to the silk screen mesh, making it permanent and reusable.
Emulsion side should be facing up towards sunlight (5-10 minutes). If it's windy, place weights on the stencil like tiles from a hardware store. Rotate the tiles so the stencil cures evenly.

Now your EZScreen DIY screen print stencil is ready to use!

We strongly recommend testing this process first with the small EZScreen test piece provided in every black bag. Do not print a different transparency or design for this step as you want to test the desired artwork. Place the small test piece over the most detailed portion of the design and follow the steps above. If you encounter any problems with the test piece, view our Troubleshooting page for help or contact us right away for assistance.
View our How-To Make a DIY Screen Printing Stencil video:
- Choosing a selection results in a full page refresh.
3 comments
Wolf Buchroeder
When doing words…. Does it matter whether they are the right side up or mirrored/reversed.
Can you use either side of the silkscreen sheet to apply the ink/underglaze to?
Beth Behrhorst
Someone gave me a speedball silkscreen light just like the one you carry. I have a whole supply of your silkscreen material already. Could you give me instructions on using the light instead of the unreliable sunshine! Thank you so much…. Beth
wendy cummings
Hello, when I placed my screen in the sink I could see a very light shadow but it didn’t seem to get any clearer or darker as the 15 minutes past. Once I took it out of the sink I could seethe emulsion was not removed from the back side so I repeated the cleaning steps as directed, no improvement, again 3 more times, nothing. I tried to see if it would print, no dice. I’m very disappointed. Would you please help with where to problem might be? I would like to see a video on printing your image but I’m pretty sure it was on the correct side. Thanks!