


How-To Screen Print a T-Shirt
How-To Screen Print a T-Shirt Step by Step

Start by gathering your supplies:
- Completed EZScreen stencil (View step-by-step instructions on making your custom stencil)
- T-shirts or other items to be printed
- Speedball or Jacquard screen printing ink
- Squeegee
- Plastic canvas
- Plastic frame (optional)
- Blue painters tape (optional)
- Popsicle sticks or another item to scoop the screen printing ink
- Paper towels

Position EZScreen Silkscreen Stencil on t-shirt. Use a plastic frame for multiple printing or for preventing ink from going on the t-shirt.
Note: Place a piece of cardboard or paper inside the shirt to prevent the ink from bleeding through the other side.

Attach the EZScreen stencil to the plastic frame using blue painters tape. This step is optional, and a plastic frame does not need to be used for every project.

Using the popsicle stick, add a generous amount of screen printing ink to the squeegee.

Spread screen printing ink over the stencil until the entire surface is coated.

Lift the EZScreen Stencil on each corner to check for voids (this step is easier without a plastic frame). If there are areas of missing ink, lay the stencil back down and go over that area again with the squeegee and more ink.
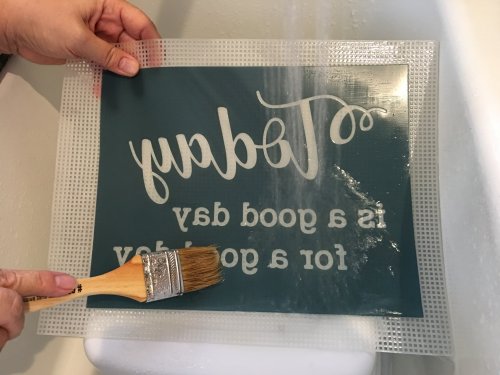
Before the ink dries, quickly rinse the EZScreen Silk Screen Stencil using a washout brush and a plastic canvas for support. Blot excess moisture with paper towels and lay stencil emulsion side up to dry. For multiple printing, skip this step and lay the stencil onto the next item to be printed. Wash out the stencil when the ink becomes difficult to push through the stencil, as ink will begin to clog the silk screen mesh.

Completed custom screen printed t-shirt! When the ink has completely dried, heat set shirt with a dry iron or heat press.
Note: Wait one week before washing.
- Choosing a selection results in a full page refresh.